Hand Scaling Tips for Dental Hygienist


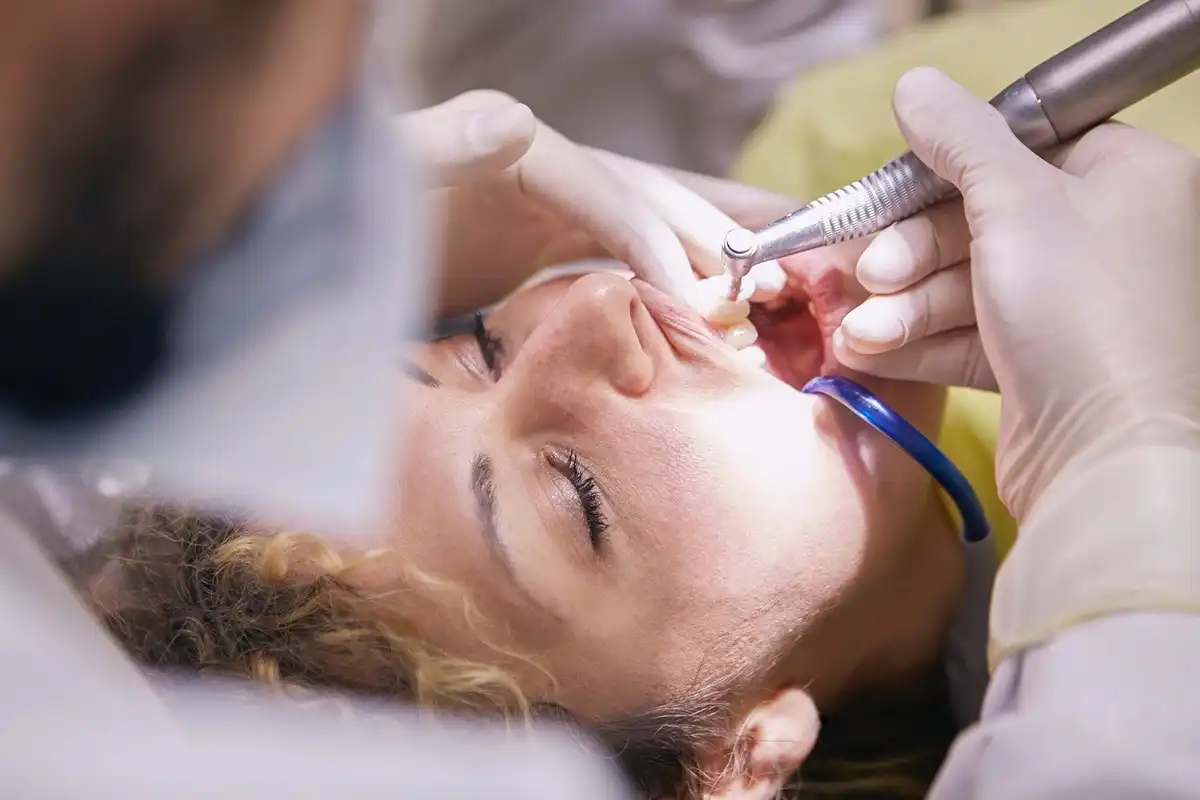
No matter how long you’ve been a hygienist, there will always be scenarios where hand scaling teeth (vs. using an ultrasonic) will be a must. Maybe your patient just doesn’t have a lot of buildup, they have sensory issues or extremely sensitive teeth, or there are medical concerns that prohibit the use of an ultrasonic. Following these hand scaling tips for RDH professionals will help you clean your patient’s mouth effectively and efficiently so that you can provide the best care without falling behind on your schedule.
Choose the Right Scaler (or Curette)
Before you start hand scaling teeth, make sure you have the right setup. You’ll need anterior scalers, posterior interproximal scalers, curettes to match the depth of your patient’s periodontal pockets, yadda yadda. And every RDH has their favorite scaler, so being sure you love your instruments will make it even easier when you’re getting ready to manually remove deposits. Maybe it’s a standard sickle scaler, S2O4S, or a Montana Jack. If you’ve been in the hygiene industry for more than 5-10 years, there are a lot of new instrument designs out there to try, so be sure to talk to your supply rep or hit up a few booths at your regional dental convention. Chances are that every few years you’ll find something new out there that could make your job a little easier. It never hurts to look.
Hold Your Instrument Properly
When you’re hand scaling teeth, one of the most important tips for RDH clinicians is that you’re holding your instrument properly. Otherwise, you run the risk of carpal tunnel syndrome and occupational injuries. Not to mention possibly injuring your patient in the process.
Ideally, you want to grasp your scaler with a modified pen grasp without going overkill on all of your hand muscles. Hold it just firmly enough, without contracting through your entire hand and wrist. You can hold it tightly for a little while if you’re working on a tenacious piece of tartar, but if you do that on a regular basis it’s not an if, but a when, that you’ll start to suffer from wrist pain. Try to take some of that force out on your fulcrum finger if you have to, to make it less tempting to grip the handle so tightly. The straighter you keep your wrist, the healthier it is for you on an occupational level.
Again, this is where having the right instrument comes into play. When you choose the appropriate angle and blade, you won’t have to work as hard when you’re hand scaling teeth.
Double-Check the Angle of Your Working Blade
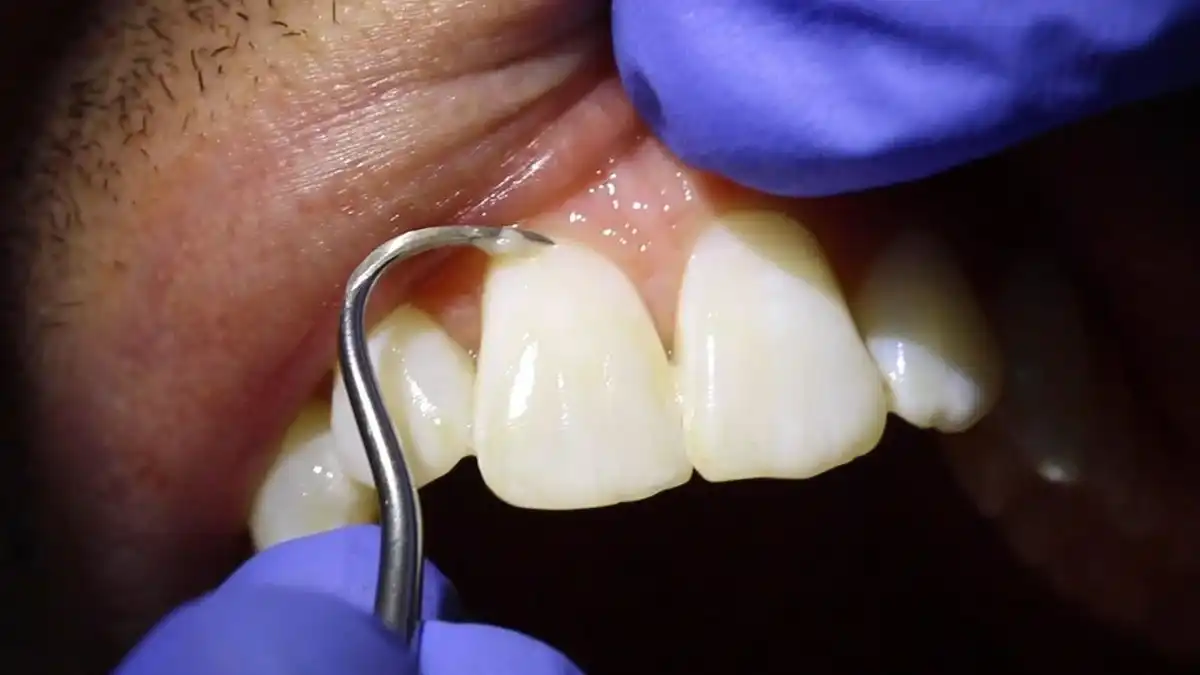
Besides your grip on your instrument handle and which type of scaler you’ve chosen, the most important tips for RDH hand scaling also include the angle of your blade. Your working blade and the face of your scaler need to be angled appropriately. Otherwise, you’ll only be burnishing the buildup on the surface of the tooth, which can make it even harder to remove even if you’re hand scaling properly. Try to keep that terminal (working) shank at the end of your scaler parallel to the tooth. If it’s a straight sickle scaler, give yourself 60-70 degrees for your working strokes. Keep in mind that you’ll need to shift the angle of your blade face as you move tooth to tooth. You can think of it as walking the instrument from one tooth to the next. If you’re scaling the mesial or distal surface, feel free to turn the scaler and sweep it along the facial or lingual (perfect for one tooth at a time techniques or on young children.)
Side Note: Remember that you’re not hand scaling teeth with the entire blade. Stick to the 1/3 closest to the toe of the blade, which is your working area.
Make Sure Your Instruments are Sharp Enough
There’s nothing worse than trying to hand scale teeth with a dull blade. It will require more time, energy, and pain on the part of your wrists (not to mention the patient.) Remember that some instruments become duller the more often they’re sterilized and obviously the more they’re used, so always check their sharpness and have a sharpening kit on hand when you need one.
Focus on One Surface at a Time
When hand scaling teeth, I always make it my goal to focus on one surface at a time. First, I focus on all of the surfaces away from me, then the ones closest, and then the facial and lingual surfaces. You can mix these up into whatever order you like. By limiting yourself to one surface area at a time, you’re minimizing instrument changes and being more efficient.
If you tend to feel overwhelmed when you’re hand scaling adult patients, breaking it down into surfaces helps you stay on track. Take your time. Scale all of the distals. Then once you’re done with that, scale all of the mesials. And it’s ok if you’re overlapping onto the facial or lingual/buccal a little bit at the same time. By the time you get to scaling those surfaces, there will be less buildup to remove, making it easier to work your way through those areas. You don’t necessarily have to go in one specific order; just do whatever works for you, your instrumentation setup, and how often you care to reposition your chair.
OR Focus on One Tooth at a Time
If you need to, consider focusing on one whole tooth at a time. Try not to look at the other ones. Use your instrument to clean the appropriate surfaces, switch it out for the other surfaces, then do one last exploring sweep to make sure you’ve removed all of the subgingival deposits. The one-tooth-at-a-time technique might be best when you know you have a squirmy pediatric patient!
The downside to using a one-tooth-at-a-time method for hand scaling teeth is that you’ll be changing your instrument much more frequently. This can add time to your appointment.
One Final Check
After you’ve scaled all of your patient’s teeth, go back through once more either with your scaler of choice or an explorer and double-check everything. As you run the instrument along the gumlines, keep using that exploring stroke to feel for any residual deposits that you might have missed. And don’t forget to floss, using the strand to feel for rough areas or anything catching on the interproximal surfaces.
Wrap it up
When you’re hand scaling teeth, follow these simple tips for RDH clinicians: Choose the right instrument for the job, make sure you’re holding it correctly both for your hand and based on the design of the instrument. Stick to a one surface at a time approach (or one tooth at a time, if you prefer) and relax: you’ve got this! Break down bigger jobs into teeth and surfaces, focusing on what’s in front of you without allowing yourself to get overwhelmed about the entire mouth. As long as your instruments are sharp enough and you’re using the working edge correctly, you’ve got everything you need. Make sure to do one final check with an exploring stroke and dental floss to catch any subgingival deposits you might have missed.


Make your inbox smile!
Subscribe